Like what you see and want to learn more? Visit my business page!

http://www.revitalizewithstefania.com

Monday, December 3, 2012

Gift Guide 2012

Here are some of my favorite things- all food and kitchen related, natch. Everyone needs to eat, so why not hook your friends and family up this year? There are items at various price points- from under $10 to over $100.

A really nice cutting board:

A good set of knives to go with the cutting board:


A slate cheese board- you can label the cheeses in chalk right on the board. Simple and classy. Package some raw vegan cheese (or brie, for those eating dairy) and fig jam with it, if you really want to make their day!


Olive wood spoons. We have these and use them every day, several times a day. The wood is strong, doesn't dry out like typical wood spoons, and wooden spoons are better for your pans than metal utensils. This is a good mid price point item. You could also get individual spoons for smaller gifts or stocking stuffers:

blender. I use my blender every single day and cannot imagine how I would get by without it. If you know someone without one, be their Santa!


A food processor- another item I use at least several times a week.

A healthy eating guide- the Kindle version of this one is a steal for a very limited time! So many people will be coming up with diet related resolutions for the New Year, help set them up for success.


A juicer. Fresh-made fruit and vegetable juice makes your cells dance. This would make a great gift for a family- include a basket of produce for them to start off with if you are being really generous!


Have you done any holiday shopping yet? What will you be giving this year?

Wednesday, November 28, 2012

Stuffed Turban Squash

I had bought this big turban squash originally as an autumn decoration- I just thought it was pretty, and had no idea whether it is normally eaten. Then the time for pumpkins, gourds and bales of hay passed, and the squash was still looking fabulous. I thought it would be a shame to throw it out if it hadn't gone past it's prime. So I googled "stuffed turban squash recipes"... and only came up with one. Aaaand it was a no-go, being primarily stuffed with sausage. So, I came up with my own, and as large as the dish came out, we demolished it and my husband was asking for more. I would say that is a success!

I used adzuki beans as that's what I had on hand. They are often used in Japanese cooking, both in savory dishes and desserts. They work well with the sweetness of the brown sugar, cranberries, carrots, and the flesh from the squash. This made a lot of extra stuffing, about double what I needed. Fine by me- it just means one less meal to cook later if you freeze or refrigerate it.

Also, I didn't have any chestnuts or hazelnuts, but I think roasting some, roughly chopping them, and throwing them into the mix would be awesome.

Stuffed Turban Squash 

1 large turban squash- I think mine was about 4 pounds
2 tablespoons coconut oil
1 onion, diced
2 carrots, diced
2 cups wild rice
1 cup adzuki beans
1/2 cup dried cranberries
4 tablespoons brown sugar
1/2 cup breadcrumbs (I used my own, ground up from stale sourdough bread)
1 tsp salt
1 tsp black pepper

1. Preheat oven to 350 degrees.

2. Cut off top of squash (like you would a pumpkin) and scoop out the stringy flesh and seeds. (I just threw the seeds out this time, but you could roast them the way you would butternut squash or pumpkin seeds.) Place the squash cut side down on an oiled baking pan. Roast for an hour or until flesh is tender. Scoop out the flesh and set aside.

3. Rinse beans and rice and put it all in a large pot. (Check beans for stones.) Cover with enough water to boil (about 6 cups.) Boil until both rice and beans are cooked. Drain off any excess water.

4. In a skillet, saute the onion and carrots in the coconut oil on high until onion is translucent and carrot is tender. Add 2 tablespoons of the brown sugar and stir to coat, allowing the mixture to caramelize slightly.

5. Toss the rice, beans, scooped squash flesh, carrot/onion mixture, cranberries, salt, pepper and the remainder of the brown sugar until just combined. Scoop the mixture back into the empty squash. Top with breadcrumbs, and place the top of the turban back on. Put the whole monster back in the oven for a half hour, again at 350 degrees.

Any excess stuffing can be placed alongside the squash if there is room, or in a separate oven-safe pan. I froze whatever didn't fit for later. Good thing, even both kids ate this without me pleading- that's hard to come by!


Thursday, November 8, 2012

Cranberry Walnut Bread


Bread may not be the healthiest thing to eat in large quantities, but at least it is easily made vegan, right? With the weather cooling way way way down, I feel like I am missing out if two days go by without baking something. Yea, I get something tasty in the process, but it also heats up the house a bit and makes it smell amazing.

This bread came about because I love cranberries and walnuts. I love them together and separately. I am a huge fan of cranberry sauce (only homemade.) I love both cranberries and walnuts in desserts. But I didn't want a dessert bread- I wanted a mostly savory (with a touch of sweetness) yeast based bread with a soft inside and crusty outside. I wanted a bread I could use for breakfast, lunch or dinner, that could be used in sandwiches, and I wanted it to contain cranberries and walnuts. I didn't want the inside to be very dense, glutinous or chewy- I thought the cranberries and walnuts would add some heft, so I wanted to keep it airy. My Google searches did not turn up anything that fit all my specific criteria in recipe form, so here is what I came up with! And bonus- there is NO KNEADING. (For those who hate kneading.)

Cranberry Walnut Bread (yeast-based, mostly savory, no knead)

3 cups bread flour
1 teaspoon active dry yeast
2 teaspoons salt
1 2/3 cups warm water (110 degrees)
2 teaspoons-2 tablespoons honey (to desired sweetness)
2 tablespoons oil (I used olive oil, but sunflower oil would work as well)
1 cup dried cranberries
1 cup walnuts, chopped

1. Combine everything in a large bowl and mix well to combine. The dough will be more of a batter than a bread dough (a little wet and sticky). It will be shaggy and hard to work with. This is ok, there is no kneading. Just make sure it is mixed as well as possible.

2. Cover the bowl with a wet kitchen towel and set it in a draft-free warm area. (TIP: the oven turned off with the light on is PERFECT for rising dough. It is just warm enough.) Let rise for four hours, or until doubled in size and quite bubbly.

3. Transfer the dough/batter to an ungreased loaf pan, it will probably deflate a bit as you do this. Cover with the wet kitchen towel and let it rise again, until the dough reaches slightly above the sides of the pan; this took about three hours for me.

4. Preheat the (now empty) oven to 450 degrees. Put the pan on the middle rack and bake for 30 minutes, or until the top is brown.

5. When the loaf looks done, pull it out of the oven and immediately pop it out of the pan. The loaf needs to release moisture. Tap the bottom, it should feel cooked, not moist, and it should sound a bit hollow. Let it cool before slicing.


Friday, November 2, 2012

A Different Take on Potato Salad

Normally I hate mayonnaise-based recipes. You know, tuna salad, potato salad, macaroni salad. (That last one is the worst- it is almost always elbow macaroni and looks like worms swimming in cream. *shudder*) I don't like mayo on sandwiches- if it is there, it has to be so thinly spread I would miss it. 

Potatoes though, in other applications, are a different story. I love baked potatoes, au gratin, mashed potatoes, etc. So I want to like potato salad, the mayo just gets in the way. 

Well I had a nearly full bag of them and nothing planned for dinner. I checked the fridge and saw a creamy artichoke dip waiting to be loved, too. Light bulb moment!

Potato Salad with Artichoke Spinach Dip and Caramelized Onions

  • 8 potatoes (I used Russet, but I think any potato that holds up to boiling and won't fall apart easily would work. Red and blue potatoes would make good choices.)
  • 2 onions
  • 2 teaspoons sunflower or coconut oil
  • 3/4 cup raw cashews (unsoaked) OR 2 avocados. (Avocados may give you a smoother texture, depending on your blender.)
  • 3/4 cup plain unsweetened almond milk 
  • 3 tbsp freshly squeezed lemon juice
  • 1-2 medium-large cloves garlic
  • 3/4 tsp sea salt
  • 1/2 tsp dry (ground) mustard
  • freshly ground black pepper to taste
  • 2 cups frozen artichoke hearts, partially thawed (helps for pulsing in blender)
  • 2 cups (loosely packed) spinach leaves


Clean and chop potatoes to bite size pieces. (I left skin on, but you can peel them if it bothers you.) Throw them all in a big pot and cover with water. Boil until fork tender. Drain and set aside. 
Roughly chop the onions. Heat a skillet over medium high heat with the oil and add the chopped onions. Stir to coat. Let them cook down and brown, but be careful not to burn or dry them out. Turn down the heat to medium if necessary. This may take a half hour to an hour, stirring occasionally. When they are brown, pull them off the burner. 
In a blender, first add cashews (or avocados), milk, lemon juice, garlic, salt, dry mustard, and pepper.  Blend until very smooth. Add artichokes and spinach and just pulse to combine- keep some texture. Optional: Transfer to a baking dish and bake 15 minutes, just to warm through. Or use it cold. 
Transfer everything to a large bowl- the potatoes, onions and the dip. You may not want all the dip, depending on the ratio of potato to creaminess that you prefer. Toss everything to coat. Traditional potato salad is served cold. This is good warm or cold, in my opinion. We ate it alongside a green salad. 


Saturday, October 27, 2012

Sourdough Sandwich Bread

In my last post, I gave instructions for creating a sourdough starter. It should be fed and grown on the counter (not the fridge) for a week before the first time using it. I find the best success in rising my dough when I feed the dough the night before I want to use it, so that it gets really active during the night. Then I mix up my dough in the morning. 

Here is a recipe I use most often- It makes a uniform, easy to slice bread which is great for sandwiches. It has a thin top crust (not super crunchy like Italian bread, but not soft like store bought sandwich bread.) I have also made dinner rolls, and Chris has made bagels, all with the same starter. The dough gets nice and sour, which I like- but you can experiment with rising time and amount of starter used to get yours less or more sour.

Sourdough Sandwich Bread

-2 cups active, 100% hydration starter {as mentioned above, feed it and let it get bubbly (active) before using it. For me, this is best done overnight.}

-3 cups bread flour (I try to use whole wheat if possible. Sometimes I just can't find it, so I use white flour. But I always use bread flour for recipes with yeast- or in this case, starter. It has more gluten and will lend better to a stretchy dough, and then will provide for a better bread consistency.)

-2 teaspoons-2 tablespoons sugar (the sugar is not really needed to feed the yeast in this recipe- the flour will do that just fine. The sugar is only for taste, and can be left out if preferred.)

-1 teaspoon salt

-2 tablespoons oil, plus more for oiling bowl- you can use olive oil for the flavor. If I don't want that flavor I use sunflower oil instead. Both work fine.

-warm water- I don't measure the water, I only add until I get the right consistency.

1. Mix everything but the water in a large bowl. I start out with a spoon but eventually it is just easier to use your (clean) hands. The dough will probably be a little scraggly. It might seem impossible to get all the flour incorporated. This is where you add some warm water. I add just a few tablespoons at a time- I don't want it getting TOO wet, I just want it to all come together and be one mass and not scraggly bits.

2. Once the dough comes together, dump the ball onto a clean, lightly floured surface. Knead with the heels of your hands for 15-20 minutes. The longer it is kneaded, the more gluten is formed. The more gluten is formed, the chewier the inside of the finished baked bread. One way to know if it is kneaded enough is to look for a "baker's windowpane."

3. Put the dough into a lightly oiled bowl (I just oil the bowl I mixed it all in, in step 1, and then move the kneaded dough ball back to it.) Cover the dough with a clean, damp kitchen cloth or plastic wrap, close to the dough to prevent a skin from forming and to allow it to maximize rising. Put the bowl in a warm, draft free place- I like to put it in the oven (turned off, of course.) I let it rise 3-5 hours, or until the dough is doubled in size, sometimes more. It all depends on how sour I want it to get- the longer it is allowed to rise, the more pronounced the sourness will be.

4. Punch the dough down a few times, and roll it onto a clean surface. Knead it a few times and transfer it to an un-greased loaf pan. Cover it again with the kitchen cloth or plastic wrap. Let it rise another few hours, or until the dough reaches the top of the pan.

5. Preheat the oven to 350 degrees. Remove the kitchen cloth and transfer the loaf pan to the oven. Bake for 30-40 minutes, or until lightly browned on top. To check if baked through, tap on the loaf- it should sound kind of hollow.

6. Remove the loaf from the pan, and allow to cool before slicing. Although, we never really let it cool enough before "testing" it.

Will you try making your own bread? I find kneading therapeutic, and the smell of baking bread is a-ma-zing when the temperature dips. Who needs candles? ;)


Friday, October 19, 2012

Sourdough 101

As the weather gets cooler, there are several things I can't help but crave. Tall boots with skinny jeans or leggings tucked into them. Thick, chunky, soft, cozy sweaters. Shades of navy blue, grey, black, brown and army green. And gluten. I just can't help it- as the weather cools down, I eat more pasta and bread. Through the summer it is easy to eschew it in favor of raw fruits and vegetables. I am still eating lots of produce, and keeping a majority of it raw, but I have been making lots of bread, too. I make it instead of buying it because  I feel that by making it, we savor it more and we eat less than if I just bought it. I can control the ingredients, it is fresher than what is found in the store, and making it is cheaper. From start to finish, baking a loaf can take hours, depending on rising time. But it is not all that labor intensive, other than maybe 20 minutes of kneading. And it makes the house smell great. 

For a while I was on an Italian bread kick, in search of a perfect crunchy crust with a fluffy/stretchy inside. Lately, though, I have been making sourdough bread. I made my own starter first, and after a week I was good to go. It is super easy, but the steps seem long, so I will make this post about the starter alone, and follow up with another post about the actual bread. 

Sourdough Starter


2 cups all-purpose flour*
2 teaspoons granulated sugar (optional)**
1 packet (2 1/4 teaspoons) of active-dry yeast
2 cups warm water (105 to 115 degrees F.)***

* I use bread flour- it has a high gluten content. I use bread flour exclusively when yeast is the leavening agent, and pastry flour when baking soda or baking powder is the leavening agent. Bread flour is higher in gluten, which makes the bread have a chewy texture, instead of a crumbly  texture like cake or cookies. I try to stick with whole wheat for both types, if possible. 
** Adding a little sugar will help jump start the yeast process, as yeast feeds on sugar for its energy. Yeast rises by feeding on the sugars in flour, and expelling carbon dioxide in the process. That's why using just a little sugar can help boost this process. Don't overdo the sugar.
*** Our water runs through a filtration system which removes chlorine. Chlorine can inhibit yeast activity, so you may need to use bottled or distilled if your water is not filtered. Experiment!

Mix the flour, sugar, and yeast together in a clean and sterile container (use only glass, glazed ceramic or crockery to hold your starter. No metal or plastic) that can hold two quarts. Gradually stir in the water and mix until it forms a thick paste (don't worry about any lumps, as they will disappear).
Cover the container with a dish cloth and let it sit in a warm (70 to 80 degrees F.), draft-free place. NOTE: Temperatures hotter than 100 degrees F. or so will kill the yeast. The dish cloth will let wild yeasts pass through into the batter. The mixture should bubble as it ferments (this will foam up quite a bit). Sometimes I place the container in my sink (if sourdough spills out onto your counter, it is hard to clean off once it has dried).
Let it sit out (at room temperature) for 2 to 5 days, stirring it once a day. The starter is ready when it develops a pleasant sour smell and looks bubbly.
Once your starter starts bubbling, then start feeding it daily with flour and water according to the directions below. Then stir it, cover loosely with the cloth- I used an elastic to hold it in place (allow a little breathing space), and store it on your counter top or in the refrigerator (your choice).

Your starter should be fed daily if left sitting on the counter. Every other week, if refrigerated. I keep mine in the fridge as I am not making bread every day, but only once or twice a week. When it is time to feed it, scoop a cup of it out (after stirring) and stir in one cup flour, one cup warm water. When scooping a cup out, you can either use it in baking or you can throw it out. I typically use it to bake since I am baking once or twice a week. I will go into more detail about the process I use when preparing to bake and the actual baking in my next post. 

Do you like sourdough bread? Do you have a weakness for gluten like I do? I guess there are worse things, right? ;)

Wednesday, September 26, 2012

Food Journal and Diet Changes

It has been a while since I shared a food journal. To be clear, I do NOT track calories or keep track of what I eat everyday. I think that can be restrictive and I feel it would lead to disordered behavior for me, personally. I do however, sometimes plan what I might eat the next day before going to bed. It helps when I am trying to feed the kids AND myself and the kids are yelling because they want to eat NOW! I have found that if I don't do this my meals become an afterthought and I grab whatever looks good, even though it might not be nutritionally sound. I also find that without jotting down some ideas for what I might eat, I don't eat enough, and I am left cranky and hungry. Or as I like to call it, HANGRY. 

I don't always follow the plan 100%- sometimes dinner is different than what I had in mind, or sometimes I have a scoop of homemade ice cream or a homemade cookie for dessert. (I try not to buy this kind of stuff; I figure if I make it just once in a while, we will eat less of it than if we buy it. Plus I can control the ingredients.)

Lately I have changed my approach to what I am eating- mainly I now eat much more fruit, less smoothies. I was starting every morning with a giant green smoothie, loaded with spinach or kale or some other greens, a banana or two, almond milk and various powders (cacao, maca, nutritional yeast, hemp, etc.) The smoothies were high calorie, high protein, and sometimes high (good) fat, and they left me very full, but I still felt like I was missing some energy, and I was getting bored. I will probably go back to them as breakfast once I am bored with my current approach, though. 

At the moment (and it is subject to change at any moment) I think of myself as a high-carb-raw-vegan-frugivore until dinner. I eat LOTS of raw fruit, some raw veggies and drink LOTS of water all day and then dinner is cooked and sometimes vegan, sometimes not. (But always vegetarian.) I have noticed really easy weight control without even having to try, and despite the fact that I seem to eat more and more fruit and calories every day. I have also noticed an improved and steady mood throughout the day. And much better sustained energy. 

Here is what a typical day might look like- this was yesterday. 

Breakfast
40 oz of plain water upon waking
4 oranges, 2 grapefruit, 2 lemons- all peeled and thrown in a blender with a pitcher-full of water and blended on high. (This way I get all the juice and vitamins AND the fiber, and it is quick to throw back one-handed while feeding two kids.)

Lunch
4 apples
2 bananas
6 big juicy Medjool dates
40 oz water

Dinner- all packed up as a picnic and brought to the park, where the kids and I met up with Chris once he was done with work
40 oz water
Sandwich- homemade crusty Italian-style bread, roasted pepper hummus, 1/2 avocado, tiny bit Romano cheese (omg yum.)
banana
handful of carrot sticks
apple

Dessert- once we got home
2 tiny squares 72% dark chocolate
1 scoop of homemade apple cinnamon ice cream (Chris had some too when he got back from a run, and then went back for seconds! It was dangerously good and too easy to make. Not a good combination haha!)

Looking back on this, I do notice that I had no dark leafy greens, and I should have eaten more veggies at dinner in lieu of, or in addition to the banana and apple. No bueno. But, as it was a picnic, and I had to pack quickly, I just grabbed what I knew would work. When we eat dinner at home, I am more able to include more vegetables. 

Do you journal your food intake? How often? How do you find it helpful?

Tuesday, September 25, 2012

Roasted Squash/Pumpkin Seeds

So in every single post about what I have been doing with my butternut squash, I say not to throw the seeds out, but I hadn't gotten around to telling you how I roast them. So here it is! 

I used the same method for (giant) zucchini seeds, butternut squash seeds, and pumpkin seeds, and they all turned out about the same, and in my opinion, tasty. 

Roasted Squash/Pumpkin Seeds

1. Clean the seeds well, separating them from the pulp and rinsing them under running water.

2. Boil the seeds for 10 minutes in salt water. (I only started boiling them first after my sister in law Ambre suggested it, and the result was much better!)

3. Drain the seeds and pat them dry. 

4. In a bowl, toss them/massage them with a drizzle of olive oil and a generous sprinkle of sea salt. (I use Himalayan Crystal Sea Salt)

5. Spread them evenly on a cookie sheet so that they do not overlap. 

6. Roast the seeds at 325 degrees for 10 minutes. Toss them about, and roast another 10-20 minutes. (This could vary for you- some batches required more time than others for me. I just kept testing for desired crispiness.)

Pumpkin seeds in particular are packed with iron, magnesium, fibre, zinc, potassium, healthy fats, protein, and tryptophan (which can boost your mood and help you sleep). Vegans & vegetarians have been using pumpkin seeds for years as a natural source of iron. Be sure to pair it with Vitamin C to absorb the most iron you can.

Wednesday, September 19, 2012

Tropical Smoothie

I have been trying harder than usual to eat a greater variety of greens lately. I already eat a lot of vegetables, but truth is, when it comes to the greens in my smoothies, I stick to spinach a lot. Spinach is great, but I might be missing out on nutrients found in other greens. So I have also been buying dandelion, collard, swiss chard,  and mustard greens. Basically whatever looks lush and green and is (ideally) in season. In this smoothie, I used dandelions. I ought to warn you though, they are on the bitter end of the spectrum, so more fruit is needed to balance them out.

Tropical Smoothie
1 cup packed dandelion greens
1 banana (fresh or frozen)
1-2 cups chopped mango (I use the frozen mango from Trader Joe's)
3 tablespoons hemp hearts/seeds (I buy the giant tub of Manitoba Harvest Hemp Hearts and it lasts FOREVER)
3 ice cubes (if using fresh/unfrozen fruit)
2 cups coconut water or filtered water (or more to thin)

Blend everything together on high.

The hemp is a good source of protein, among many other nutrients. This smoothie will keep you full straight through your morning!


Tuesday, September 11, 2012

Butternut Squash Baby Food

My son Azrael is now 7 months old (what?!) and has been eating homemade baby food for a month now. Since our diets are pretty clean and free of most common allergens, he often eats what we eat- I just mince it up into tiny pieces right on my plate. But I also made some baby food puree that we could turn to for something quick and easy. I like to have back up food like this especially if we are going to be away from home- that way he is guaranteed something. 

Along with the chips, soup, etc that I made with the butternut squash from my mother in law's garden, I made butternut squash puree for Azrael. It is so easy and quick to make your own baby food, much cheaper than the jarred stuff, more environmentally friendly (no teeny tiny jars to contend with), aaaand you know what is going into the food. (The government allows for a small percentage of such things as rat feces in the manufactured stuff. Mmm, poop anyone?)

With Aurelia, I did the same thing, making my own baby food. But I started her on one food/ingredient at a time, to test for allergies. As Azrael is the second kid, (you know how they say you don't do everything for the other kids that you did for your first? It's true) I went straight to seasoning and mixing foods. Nothing I have been feeding him is a common allergen- it's all fruit and vegetables. If we give him eggs, seafood, dairy, or anything containing gluten in the future, I plan on following the one ingredient protocol. And of course, they don't eat meat or chicken. Fish, eggs and dairy are seldom consumed. 

Butternut Squash Baby Food Puree (if not thinned/pureed completely, could be served as a mash-type side dish)

1 large butternut squash
1 onion
1/2 tsp nutmeg
1/2 tsp sage
3 tablespoons coconut oil
water to thin out as needed

Peel squash and slice in half. Scoop out seeds and set aside (for something else I will post.) Chop squash and onion into 1 inch pieces. Toss everything together with the oil, nutmeg and sage in a roasting pan. Roast about 45 minutes, stirring half way through, at 350 degrees. 

Let it cool, then put it all in a food processor and puree, adding water if needed. Since he is only starting on solids I pureed it rather thin and smooth. But as he becomes accustomed to solid food and chewing, I will make it more and more chunky. 

Pour/spoon the puree into an ice cube tray and tap the tray down gently to get the puree to settle and avoid air bubbles. Freeze the tray until the puree is solid. When frozen solid, pop the cubes out and store them in a freezer safe container. That way, you can pull out one or two at a time to defrost, depending on how much your baby can eat in one sitting. 

Bonus tip! Coconut milk, meat and oil are really good for babies. Coconut is a source of lauric acid, which is found to have antiviral, antimicrobial, antiprotozoal and antifungal properties. Breast milk is also a good source for lauric acid for babies. But it is important for everyone, not just babies, so coconut oil and milk should be added to most diets. 


Thursday, August 30, 2012

Beets and a New Smoothie!

I don't love the flavor of beets. I try, I really do, and I still eat them often. But they aren't my favorite. I had some tiny ones in the fridge and they weren't going to last much longer. They weren't enough to make into a meal for the whole family, so I just had them myself in a quick, late day, pick-me-up smoothie.

Sweet Beet Smoothie

1 1/2 cups beets, cleaned and chopped
2 bananas (sliced, preferably frozen, but fresh is okay too)
1 peach (sliced, preferably frozen, but fresh is okay too)
2 cups water (or more depending on desired consistency)

Throw everything in a blender with the water and blend on high. If you use fresh fruit instead of frozen fruit, add 3-4 ice cubes. 


Beets are really sweet to begin with, but they have a distinct flavor. The addition of bananas and peach slices only adds to the sweetness and helps to disguise that "beetness." Not everyone needs it to be covered up, I know- but I sometimes do, haha. This was delicious!

Beets are high in folate, fiber, manganese and have a good amount of potassium, vitamin C and iron. Bananas are high in fiber, vitamin C, Potassium, Manganese, and Magnesium. Peaches have vitamins A and C, as well as fiber.

Thanks to my mother in law, Billie Jean for her garden harvest, including these beets. :)


Wednesday, August 29, 2012

Vegan Butternut Squash Soup

Butternut squash soup embodies fall, in my opinion. While I just received a good amount of squash and it is still summer, the flavor of butternut squash screams autumn. And I am not complaining.

Between butter, heavy cream/half n'half, and chicken stock, a typical butternut squash soup is far from vegan. And while you are still getting a ton of nutrition in a bowl, it can definitely be made healthier and without harming or exploiting any animals. So that is what I set out to do, natch. ;)

Vegan Butternut Squash Soup

2 large butternut squash
1 large yellow onion
3 carrots
2 stalks celery
6 tablespoons coconut oil- (Don't be afraid of coconut oil! It helps fight Alzheimer's disease and helps the body to burn fat, among MANY other benefits. Imagine that :)
3 tablespoons sage
2 teaspoons nutmeg
1 1/2 cups cashews, soaked 6 hours or overnight
4 cups water
1 vegetable bouillon cube
1 tablespoon onion powder
salt
fresh ground pepper

Preheat oven to 350 degrees.

Peel two big squash and scoop out seeds (reserve seeds- I have a post coming where I tell you what to do with them!) Chop up the squash into 1 inch cubes and lay them in a roasting pan. Roughly chop the onion, carrot, and celery into 1 inch pieces and add it to the roasting pan.

Drizzle in 4 tablespoons of coconut oil and toss the vegetables to coat. Sprinkle two tablespoons sage, one teaspoon nutmeg and toss again to coat.

Roast the mixture about 1/2 hour, or until everything is fork tender. Let cool.

Rinse the soaked cashews and put them in a blender. Add 4 cups water and blend on high until creamy.

In a big stock pot, heat 2 tablespoons coconut oil on medium. Add the cashew milk and stir occasionally.

Put a little bit of the vegetable mixture into the blender and puree. Add a tiny bit of water (or the cashew milk from the pot) if the blender is not able to puree without it. Puree the mix in batches, and add the puree to the milk.

Stir the soup well to incorporate everything. Add the vegetable bouillon, onion powder, 1 tablespoon sage, 1 teaspoon nutmeg, few pinches salt, and fresh ground pepper to taste.

This made a very large batch for me- we were having guests and also wanted to have some leftover. It made a light lunch along with a cucumber salad.

Friday, August 24, 2012

Butternut Squash Chips

I mentioned on Facebook earlier today that I had received a bunch of butternut squash from my mother-in-law's garden. I spent a good amount of my morning cleaning, peeling, chopping, cooking, blending, or otherwise preparing it. I like to do things in big batches so as to save time and energy, so I made it several different ways all at once. My mother in law had requested that I try making butternut squash chips, so that is one of the ways I utilized the squash. These chips were kept simple and savory. 

Butternut Squash Chips- original flavor

1 butternut squash, washed and peeled
good olive oil
Pink Himalayan salt 
fresh ground pepper

1. Cut squash in half and scoop out seeds/pulp. (Save the seeds- we've got plans for them in a future post ;)
2. Use a mandolin to slice the squash as thinly as possible. 
3. Toss them in a bowl with a good quality olive oil. (Flavors become super concentrated when you dehydrate- it is worth it to use a good oil here because the flavor will shine through.) Crack lots of fresh pepper in and sprinkle a pinch of the salt. Toss well to coat everything. 
4. Lay the slices in a single layer on dehydrator trays- use mesh trays, not Teflex sheets to ensure they dry as quickly as possible. 
5. Dehydrate as long as necessary. The thicker the slices, the longer it will take to achieve a CRISPY texture. 

Enjoy these addictive but healthy snacks!

Anyone out there make their own chips (healthy or not?) What are your recipes?


Wednesday, August 15, 2012

Fruit Overload

What do you do with fruit that needs to be eaten ASAP, or else it will go bad? Make a smoothie, of course!

Smoothies are my go-to food. I can pack a ton of fruit, greens, "super food" powders, nuts, and seeds into them. I can make them high calorie, high fiber, high fat, and/or high protein, depending on what I am needing or craving. I have one every single morning, and it lasts me well until lunch time. Without one for breakfast, I feel lost. Yea, I suppose I could eat fruit, cereal, yogurt, whatever, and sometimes I do, but I almost always have to have a smoothie first. 


This smoothie came about because I had about a pound of strawberries to use up. Aurelia had about 4 or 5 of them, along with some carrot cake cookies, a cup of blueberries and an avocado for lunch. It was lunchtime for me too, so I dumped the rest of the strawberries into the blender, and started adding whatever caught my eye. The result is yummy! It made a good lunch, paired with some carrot ginger crackers and avocado.


Strawberry Almond Joy Smoothie (raw vegan)

1 pound strawberries (more or less, depending on how hungry you are)
1 1/2 cups almond milk (see this post for instructions on making your own! Note: I am now straining out the pulp every time.)
2 tbsp raw cacao powder (you can use regular cocoa powder if that is what you have.)
1/4 cup shredded unsweetened coconut, plus a sprinkle for garnish
4 ice cubes
sprinkle of cacao nibs for garnish (optional- you can use chocolate chips or shaved chocolate if that's what you have, or just omit altogether)


Blend everything (but the garnish) on high, making sure ice is incorporated. Pour into a large glass, and garnish with cacao nibs and shredded coconut. Enjoy immediately.


What do you do with excess fruit? And do you make smoothies? If you have a favorite recipe, link it up in the comments!


Thursday, August 9, 2012

Carrot Cake Cookies

Say that three times fast! This was another "necessity is the mother of invention" recipe. As I mentioned previously, I have been juicing A LOT of carrots and I am left with A LOT of pulp. I have been making a lot of my Carrot Ginger Crackers, but I was craving carrot cake something fierce. These give that same flavor, a soft moist texture, but none of the awful ingredients that go into conventional carrot cake. Thy travel well, and you can just pop them in your mouth.

Carrot Cake Cookies

1 cup walnuts
1 cup pitted dates
2 cups carrot pulp from juicing
1 tsp cinnamon
1/2 tsp ginger
1/2 tsp allspice
1/2 cup raisins

Mix everything but raisins in a food processor until well combined. Empty the batter into a bowl and mix in raisins by hand. Roll batter into balls a tablespoon at a time. Flatten slightly and store in the refrigerator. Once refrigerated, the batter should firm up a bit and hold together.

My almost two year old LOVES these. And I love giving them to her- all that nutrition! (Side note: almost two years... what? Where did those two years go?)

Wednesday, August 8, 2012

Raw Vegan Basil Cashew Cheese

One of the things I miss most is cheese. Brie, mascarpone, ricotta, super sharp cheddar, mozzarella, provolone. Always the strong stuff, pungent and full of flavor.  Every once in a while I still sneak a bite, and then I regret it. I end up feeling like a fake, a fraud. Plus, my stomach just hurts afterwards. So, I have wanted to find a replacement- something that would fool my taste buds, that was made of raw, vegan, organic and whole food ingredients. The raw food world has shown us cheese made from nuts before, so I might be reinventing the wheel here, but I needed to do this for myself. I also needed to find a use for pulp leftover from cashew milk. I plan on experimenting some more to achieve different tastes and textures.

Raw Vegan Basil Cashew Cheese

1 1/2 cups pulp from making cashew milk
juice from one lemon
large pinch of salt (I only use pink Himalayan sea salt- better flavor and better for you, in my opinion.)
handful or two of fresh basil

Pulse to combine everything well in a food processor. Spoon mixture into a miniature spring form pan (or you can do what I did and use a cookie cutter, or several cookie cutters) and press down to fill any pockets. Refrigerate for 6 hours so the cheese can get firm and solidify. Garnish with more basil.

The texture of this is very similar to ricotta, and makes a good topping for raw crackers (as shown here) or mini toasts, baguette slices, etc. I think it would pair well with bruschetta- mmm! The taste is very mild, also like ricotta. I can't wait to experiment with other flavors and using this as a base for more recipes.


Have you made your own cheese (raw, vegan, or conventional dairy?) Recipes to share? Link up to yours in the comments!


Monday, August 6, 2012

What do you really need to start on the raw vegan lifestyle?

So if you read health and nutrition blogs as much as I do- especially those focusing on the raw vegan lifestyle- you might feel overwhelmed. I know I did for a while. It seemed as though I was going to get nowhere unless I had a really pricey Excalibur Dehydrator, a high speed blender such as the Vitamix, an upscale juicer, etc. While I have (among many kitchen appliances) a dehydrator, a blender, and a juicer, I did not buy any of them. They were all gifts to me. Eventually, when I have done all I can with these appliances, I would like to upgrade, but for now they will do.

The one appliance out of all of them that I would not survive without is the blender. I have at least one smoothie or juice a day, usually several. It has a hard time with some fruit, especially frozen fruit, and I have to use sufficient liquid to mix and incorporate everything well, but it provides me with quick and nutritious meals that I can drink quickly and on the go if need be. And the price can't be beat. The model I have has one motor for both a blender and a food processor. This thing is worth every penny in my opinion. I haven't seen it priced over $150!

Of course, I still plan on getting a Vitamix eventually. But my Cuisinart is holding out very well until then.

Are you in the market for a blender? Don't want to spend a fortune? Try this machine on for size!  

And if you would rather buy the upscale option upfront, I doubt you would be disappointed.

Friday, August 3, 2012

Banana Nut Cookies

I feel like the vegan Paula Dean here, but "y'all are gonna love this recipe." I recently posted about how I started making my own nut milk. (I may just be a perv, but that never seems ok to say out loud or to write...)  

Since I didn't have a dehydrator, and I didn't yet have a clue about how to use almond pulp, I was not straining out the pulp. I would just shake the milk extra hard before using it. The pulp left the milk kind of gritty though, and I knew we would all prefer it to be creamier and smoother- Aurelia included.

Now that I have a dehydrator though, I have started straining the pulp out and I finally found a way to use it. Cookies! Banana Nut cookies, to be specific.

These treats are raw, vegan, and comprised of whole food ingredients I feel good feeding my family and eating myself. In fact, I don't think they make a bad breakfast or snack, either.

Banana Nut cookies

2 cups almond pulp
1 ripe banana- the riper the better. Ripe bananas are sweeter and you won't need as much added sweetener
2 tbsp maple syrup, agave syrup, or raw honey
1 tbsp liquified coconut oil
1 tbsp cinnamon
1/2 tbsp allspice
pinch salt
cacao nibs, chocolate chips, or chopped chocolate chunk- the darker the better. (optional)

1. Use a food processor to blend up everything but the cacao or chocolate. Or you could mix well by hand.

2. Roll the batter into small balls, then gently flatten and place on a dehydrator tray. The batter does not spread, so you could place the cookies close together.

3. If desired, you can sprinkle the tops with the cacao/chocolate (pressing in slightly). I guess you could just mix the chocolate into the batter, too. They were an afterthought for me, so I had already formed the cookies before adding the chocolate.

4. Dehydrate at 115 degrees for 5 hours, or they are as crispy/chewy as you like. After 5 hours, the outsides were a bit crisp, but inside they were chewy.

5. You could try baking these in the oven at the lowest temperature, they just won't be raw. I would keep a close eye on them.


Tuesday, July 31, 2012

Carrot Ginger Crackers

So, when I brought the dehydrator home I already knew the first thing I wanted to make. You see, I have been juicing A LOT of carrots. And I mean A LOT. 15 pounds a week, to be exact. So far, I have not turned orange. But my skin has gotten super clear, I have a bit of a tan- probably nothing noticeable to others, and I know all that beta carotene is protecting my skin from the sun. I still use sunscreen if I will be in direct sun, like at a pool, but not otherwise. And the carrot juice is DELICIOUS. A bit sweet, not too much, and super concentrated carrot flavor.

All that juicing creates LOTS of carrot pulp, and I didn't want to waste it. I was thinking I would either make a raw vegan carrot cake, or some sort of cracker. I had already used some pulp in a regular (but healthy) version of carrot cake- the jury is still out on whether it was a winner. So I thought the cracker would be easier to figure out for my first go at dehydrating.

Verdict- yum!


Carrot Ginger Crackers

2 1/2 cups carrot juice pulp
4 tbsp soy sauce/Tamari/Bragg's Liquid Aminos
3 tbsp Agave/Honey/Maple Syrup
1 cup milled flax
1 tbsp onion powder
1 tbsp garlic powder
1 tbsp ginger powder
2 1/2 tbsp sesame oil
3 tbsp sesame seeds (I used black ones, but either kind would work)
water, if the dough doesn't hold together well enough to spread. Add a little at a time.

Mix everything really well. Spread mixture thinly onto two dehydrator trays with Teflex sheets. Dehydrate at 115 degrees for 4 hours, then score the crackers with a rubber spatula. Flip crackers over and remove Teflex sheets. Dehydrate for another 4 hours or until nice and crunchy. OR if you do not have a dehydrator, put them in the oven on the lowest setting. They won't be raw if using the oven, but you should still get a crunchy texture. 

Monday, July 30, 2012

A Good Family Weekend and Dehydrator Love

This past Saturday we went to Chris's grandma's house. His parents were there as well. I brought two loaves of zucchini bread to give to them and Chris made his salsa to share. We also brought fruit to snack on in the car. While the weather was still warm and sunny we played in the pool, but then we noticed some dark clouds rolling in and there was some thunder and lightning not far off. After hanging out inside for a while, everyone was getting pretty hungry so Chris's dad Clark and I went to the grocery store for the makings of dinner cooked on the grill. We made portabello mushroom burgers, grilled eggplant, and grilled pineapple. Also, the salsa was such a hit, we made a huge bowl of that again. There was also steak for the omnivores. And for dessert we roasted marshmallows and made s'mores. It was still pouring, so we took shelter in the gazebo which is thankfully close to the fire pit :).

I completely forgot to take pictures of the food, but I did get shots by the pool!


At dinner, Grammy Brenda revealed that she had a dehydrator (among MANY other kitchen devices) that she no longer uses. She offered it to me, and as I have been wanting one for a long time, I said yesofcoursethankyouwoohoo! Thanks Grammy Brenda! :)

So, ever since Saturday, I have been dreaming up the various snacks I will be using it to make! I have a few ideas in the works, but tell me, do you have any favorite dehydrator recipes to share?

Thursday, July 26, 2012

Getting My Orange Juice Fix

I love orange juice. (And juice from grapefruit, and tangerine...etc.) A long time ago we went cheap- we bought Minute Maid. The taste was always off, so we moved on to Florida's Natural, then Simply Orange. Better, but then... then we bought the fresh, unpasteurized stuff at Wegmans. They squeeze the citrus right in the store in a giant citrus juicer. The juice is super sweet, has very little pulp, and for a while we were addicted. But geeze, it is $11 for a gallon, $8 for a half gallon. So, we didn't get it every week, and I told myself it was a treat. After all, fresh fruit juice- while full of other nutrients- has lots of sugar and the fiber is usually greatly removed.

But now, we don't buy it at all. When I want citrus juice, I just make my own. Chris typically uses the citrus hand juicer and thus removes some of the pulp but not all of it. We tried putting oranges through our electric juicer, but then there was a great deal of clean up, the pulp was completely removed, and the juice was foamy.

Lately though, I just peel the fruit, remove any seeds, and throw it all in the blender with water. Blend, blend, blend, and nothing else is needed in my opinion.

It is definitely pulpy- but that is okay by me. I don't want to remove the pulp, I just want it broken up and really smooth. If you wanted to strain out the pulp but still use the quick blender method, you could strain it through a nutmilk bag or cheesecloth, I guess. You could also add more water than I used. It would make more juice and dilute the pulp, but flavor might taste watered down. I used 2 oranges, 1 grapefruit and 4 cups water for this juice. I shared with Aurelia- she loved it and didn't want me to have any!

Do you buy fruit juice? Ever make your own? What are your favorite combinations?

Tuesday, July 24, 2012

Value and Cost, DIY, and Grocery Store Compromises

For the past five years or so, I have moved more and more towards the natural and homemade end of the spectrum. It is partly because of cost- while Tide, Downy, and Clorox are conveniently ready to use, they are expensive. I make my own laundry detergent for much less (without the harmful ingredients), and the work involved is easy and quick enough that I feel it is worth it. Stacy's Pita Chips, while quite tasty, are pricey. I find it easy enough to rip up pita, toss them in olive oil and spices and pop them in the oven to crisp up.

It also has to do with safety. Making my own baby wipe solution and washing the cloth wipes is kind of a hassle, but I know exactly what goes into that solution and exactly how I wash the wipes.

Sometimes it has to do with pollution and waste. While we still occasionally use paper towels we usually opt for really absorbent rags (these ones.) We never buy paper napkins- I wash cloth ones and keep them in a napkin holder on the table. We compromised on diapers- we have a diaper service instead of washing our own, but they are still cloth. Bonus- Jim no longer uses chlorine bleach to whiten and disinfect the diapers.

While I have baked in the past, we normally buy our bread. I just could never get the crust and crumb texture quite right. But the bread we buy is up to 5 dollars a loaf sometimes. For bread! (What can I say, a good crust is imperative to me. I only partake occasionally, but I won't compromise when I do.) AND the list is slightly longer than "flour, water, yeast, salt." So this week at the grocery store I got a high gluten bread flour and found some guidelines for foolproof crusty Italian bread. Stay tuned. 

Also this past week we ran out of almond milk, as happens often. Aurelia drinks 16 oz of it a day, along with her 4 oz of breast milk. I dutifully went to the grocery store to pick up a few gallons with the rest of the groceries. When I was putting it away, I noticed it was labeled 30 calories a glass, instead of the normal 35. I thought this odd, and compared ingredients. Everything was listed exactly the same (a list that is longer than I like anyway), so the only thing I could come up with was that the company started making it thinner- less almonds, more water. While I feel like I could accept a slightly higher price (after all, it IS a tough season for many crops, maybe almonds are included), I thought not noting the change more prominently was deceptive. What am I paying for, a glorified vitamin water?

So, I finally bit the bullet and tried my hand at homemade almond milk. It is simple- soak almonds, rinse and drain. Then blend the almonds with fresh water. Blend well- a high speed blender is best, but it is worth a try with any blender. Then strain the almond pulp out with a fine mesh strainer or a nutmilk bag. You can also sweeten the milk with a natural sweetener like dates, honey, etc.

While I have a nutmilk bag, I did not strain the pulp out. I didn't want to have to find a way to use it up, and I thought it would be wasteful to throw it out. So I left it in and I just shake the milk really well before using it. Even if you do strain the pulp out, there will probably be some very fine residue, so the milk should be shaken regardless.


The verdict- it was good! I have been using it in my smoothies and Aurelia likes it too. The problem with not straining it though is that it clogs up in Aurelia's sippy cup. So she hasn't transitioned to the homemade stuff completely. But she often has some of my smoothie, or I let her sip the milk out of a regular cup with a straw.

Soon I want to make raw breads and crackers, and I think the almond pulp would make a good base for that, so I will eventually strain it out.

What (if anything) do you make yourself instead of buying? What are your reasons?


Monday, July 23, 2012

Packed Lunches

I am pretty lucky in that I have access to quality, fresh, and mostly organic produce all day long. As a full time mom (trying to start a business...), I have full control (most days) of what I and my kids eat. And lately I also usually prepare dinner, so I can make sure Chris is eating well then, too.

The giant gaping hole in this set up is that I can't make sure Chris is eating well while he works Monday through Friday. It's not that he eats poorly, it's just that driving from customer to customer, and maybe to and from the shop in between, he doesn't have time to eat. He has a morning part time job at a bakery- he eats a bagel and he is out of there by 8. Rarely does he get food on the road, and then he is home ravenous for dinner.

I hadn't really thought about this- Chris has never had to be told to eat, he is always hungry it seems. He has the appetite of a boy in high school, and always having been thin he eats what he wants, when he wants. But we were talking this past weekend when I realized he probably was not eating enough calorie-wise with his busy schedule during the work week. This can affect energy, productivity, blood sugar levels, etc.

So I have decided I am going to start packing lunch for him. But since one day's schedule is very different from the next, I don't know when or if he will be able to actually sit down and take his time to eat the food. Therefore, I am planning on only packing food that can be eaten with one hand and that is not super messy. This way, if he only has time to eat while driving, he is at least eating something, right?

Here's what I have brainstormed so far:

carrot sticks
cucumber slices
dates
crackers and cheese
pita chips
raw vegan fruit and nut bars

Maybe peanut butter and jelly/jam/fruit butter/preserves (The key here would be spreading the peanut butter and fruit thinly, so as to avoid oozing and dripping.)

Maybe avocado (I think I would slice it onto sandwiches instead of mashing, again to avoid oozing and dripping. Can you tell I have thought really hard about this...? ha.)

When available, grapes, cherries, blueberries, strawberries (fruit that can be popped into the mouth- no dripping juices! He wants to look presentable for his customers, and a messy shirt would be the opposite of presentable, methinks.)

I might rarely send whole fruit like an orange, peach, etc. Citrus requires peeling. Peaches are drippy and juicy. Maybe apples would work- I can send it pre-washed, no peeling or other prep needed. Bananas might be ok, they aren't super juicy, and they are quick and easy to peel at stoplights, no?

I plan on making my own bars, bread, crackers and pita chips. These are all items I have made before, but I may have to work some recipes a bit to suit the need here- nothing can be too messy. I don't want to sabotage Chris by having him and his car covered in crumbs, haha.

Also, some of these foods will be geared to Chris's (and Aurelia's) tastes, but not necessarily mine. But that's ok, I have been making things they eat (but I only eat rarely) for a while now. Recently I made zucchini bread- I had some as a treat as did Aurelia, but Chris ate the bulk of it. I made biscuits (a big batch)- Aurelia has been having her peanut butter and jelly on it and Chris eats them with dinner or as a quick snack when he gets home. Making Chris's on-the-road lunches to suit his tastes (and not mine) are key.

Oh, and water. There have been days this summer when it has been especially warm. Sometimes Chris tunes at homes where the customer offers a drink. But sometimes, no one is home, or he tunes at schools, churches or nursing homes were there is no one to offer a drink. I want to make sure he has water.

Do you pack a lunch for anyone? What kind of foods do you send?
To read more about what Chris does for a living, check out his blog! :)

Friday, July 20, 2012

CSA- Community Supported Agriculture

We are taking a break today from the The Great Local Food Tour, but check out all the farms we have visited so far! On Saturday we have plans to visit my favorite farmer's market, and then we might head out to  Kennett Square in search of mushrooms (I am giddy with excitement, haha. You know my love of mushrooms from this post and this one.)

Today, I thought I would talk about CSAs. I find that a lot of people don't really know what a CSA is, or they don't know the pros and cons. A lot of the farms we have been visiting operate CSAs.

CSA stands for Community Supported Agriculture, which sounds a little too general, in my opinion. When a person buys a CSA share they share in a farm's risk. The person pays in advance for a portion of the farm's total crop. If the farm does really well, the person gets a lot in their personal share, and if the farm does poorly, the person gets less. The farmer has a reliable income regardless of the weather, and in return CSA buyers pay slightly less (typically) than they would pay for that same produce at the farmers' market or grocery store. People pick their shares up at the farm, some other arranged location, or in some cases, the box of produce is delivered.

Sounds great, right? It ensures you have a steady supply of produce, it is all local, in season, and picked at peak ripeness, and the farmer has the income and support to keep doing what they do.

The past couple of summers I have thought about buying a share in a CSA- we eat enough fruit and vegetables, after all. The only thing holding me back has been variety and what to do with the things that are not my favorite foods, really. One farm might grow A LOT of bok choy and asparagus, but no lettuce, spinach, or strawberries. While I eat a great variety, and I will turn no vegetable or fruit away, I do have mainstays. I have different greens in my smoothie every morning, but spinach is definitely my favorite. I try to eat a salad every single day, if not twice a day- I don't mind dandelion greens, red leaf lettuce or arugula in that application, but romaine and butter lettuce are my favorites. If a farm does not grow those particular things, adaptation would be necessary.


That might not be a bad thing, though. I have lately been making more of an effort to eat seasonally and locally, but there is still room for improvement. We have been loving peaches and blueberries that we picked ourselves from a local farm, but I have also been enjoying grapefruit and oranges grown in Florida and California.


Also, a share would force me to explore using vegetables I don't typically eat often. Until recently I had not cooked bok choy or kohlrabi, for example. A whole box of such choices would have me searching for or coming up with new and different recipes. Necessity is the mother of invention.

So it didn't happen this year, but maybe next summer we will buy a CSA share. I am thinking to add variety, we will buy a share (or half share) from two different farms. With that, along with a garden I hope to grow myself, we will (hopefully) cut down on the grocery store bill, support local farmers even more than we already do, and improve our nutrition and health.

What are your thoughts on CSAs? Do you have a share?


Thursday, July 19, 2012

The Great Local Food Tour: Wyebrook Farm

When we got to Wyebrook we had already been to three other farms and we were pretty spent.


But we spoke to farm owner Dean Carlson, the farm manager's wife Amy, and the farm's butcher and chef Janet. Dean left his former career as a bond trader in 2009. He bought the farm in 2010, originally intending it to be an investment property. But then he learned more and more how our currently unsustainable food industry works, and wanted to become more involved. Janet came to the farm from NY, where she used to teach the culinary arts. She butchers all the animals they raise right on the farm. In addition to the animals, Wyebrook also grows some vegetables in a garden, and they have a high tunnel. However, many of the vegetables, greens, plants and herbs they sell and cook are grown elsewhere, at least for now.


On our first visit we bought a big bag of mixed basil (grown on a nearby certified organic farm, B&H), as well as eggs and locally roasted coffee beans. 


We loved Wyebrook Farm so much on our first visit that we planned immediately to return and bring friends.    We were told we could visit any of the animals they raise (pigs, steer, goats, chickens), but we were just too tired and decided we would do that next time around. Which we did!


Aurelia loved the chicks...


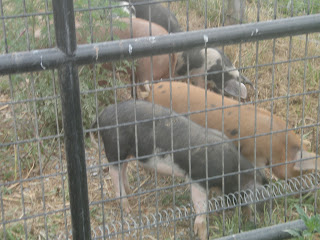
And the pigs... 

We think this one may have been pregnant?


The pigs are free to roam most of the property. They spend a lot of time in the woods where it is moist and cool. Janet said it is because they don't have sweat glands.


The pigs were eating when we got there, at the food trough. They are given feed, but over time Dean hopes to wean them and have them forage for their own food solely (which they only partially do now.) Fruit trees have been planted partly for the pigs.


Wyebrook also has a huge solar panel and we noticed a lot of the electric fencing hooked up to batteries, presumably powered by the solar panels.


In addition to the store, their is also a cafe where they sell a lot of the food they raise and grow. While the menu was very meat heavy, there were a few vegetarian options (a salad which I had and a crudites sandwich that Aurelia and I shared), and if you requested the cheese be left out you could have a vegan meal. Chris and our friends Ricardo and Justin ordered beef and chicken options.

Dean explained that he believes raising animals for meat is sustainable and even necessary for growing produce. Chickens keep pests under control. Cows and goats graze and eliminate weeds and the need to mow. Pigs forage and eat what most of us would consider waste (fallen fruit, etc.) All those animals provide manure for fertilizer. While I personally won't eat meat, I think if you are going to partake occasionally, his model of raising animals for food is the way to go.

Wyebrook Farm can be found on Facebook in addition to their website. It is a great place to take your family or a date. And they have live music!